If you are a Laravel developer, chances are you've probably heard about Laravel Horizon and used it for monitoring your queues. In case you haven't, here is a short introduction from the Laravel documentation:
Laravel Horizon provides a beautiful dashboard and code-driven configuration for your Laravel powered Redis queues. Horizon allows you to easily monitor key metrics of your queue system such as job throughput, runtime, and job failures.
I've been using Laravel Horizon for almost every Laravel application. It's super convenient to have an easy way to monitor your queues. Now, suppose you are like me and have a couple of dozens of tabs open. In that case, it can be pretty frustrating to find the correct tab with your Horizon instance, especially when working with multiple Horizon instances across numerous environments.
So I decided to take a look at the inner workings of Horizon and see if I could make my implementation and what is cool is that Laravel Horizon ships with an API. So I went ahead and started working on a dedicated desktop application that would integrate with Horizon's API and make it super easy to jump across my Horizon instances.
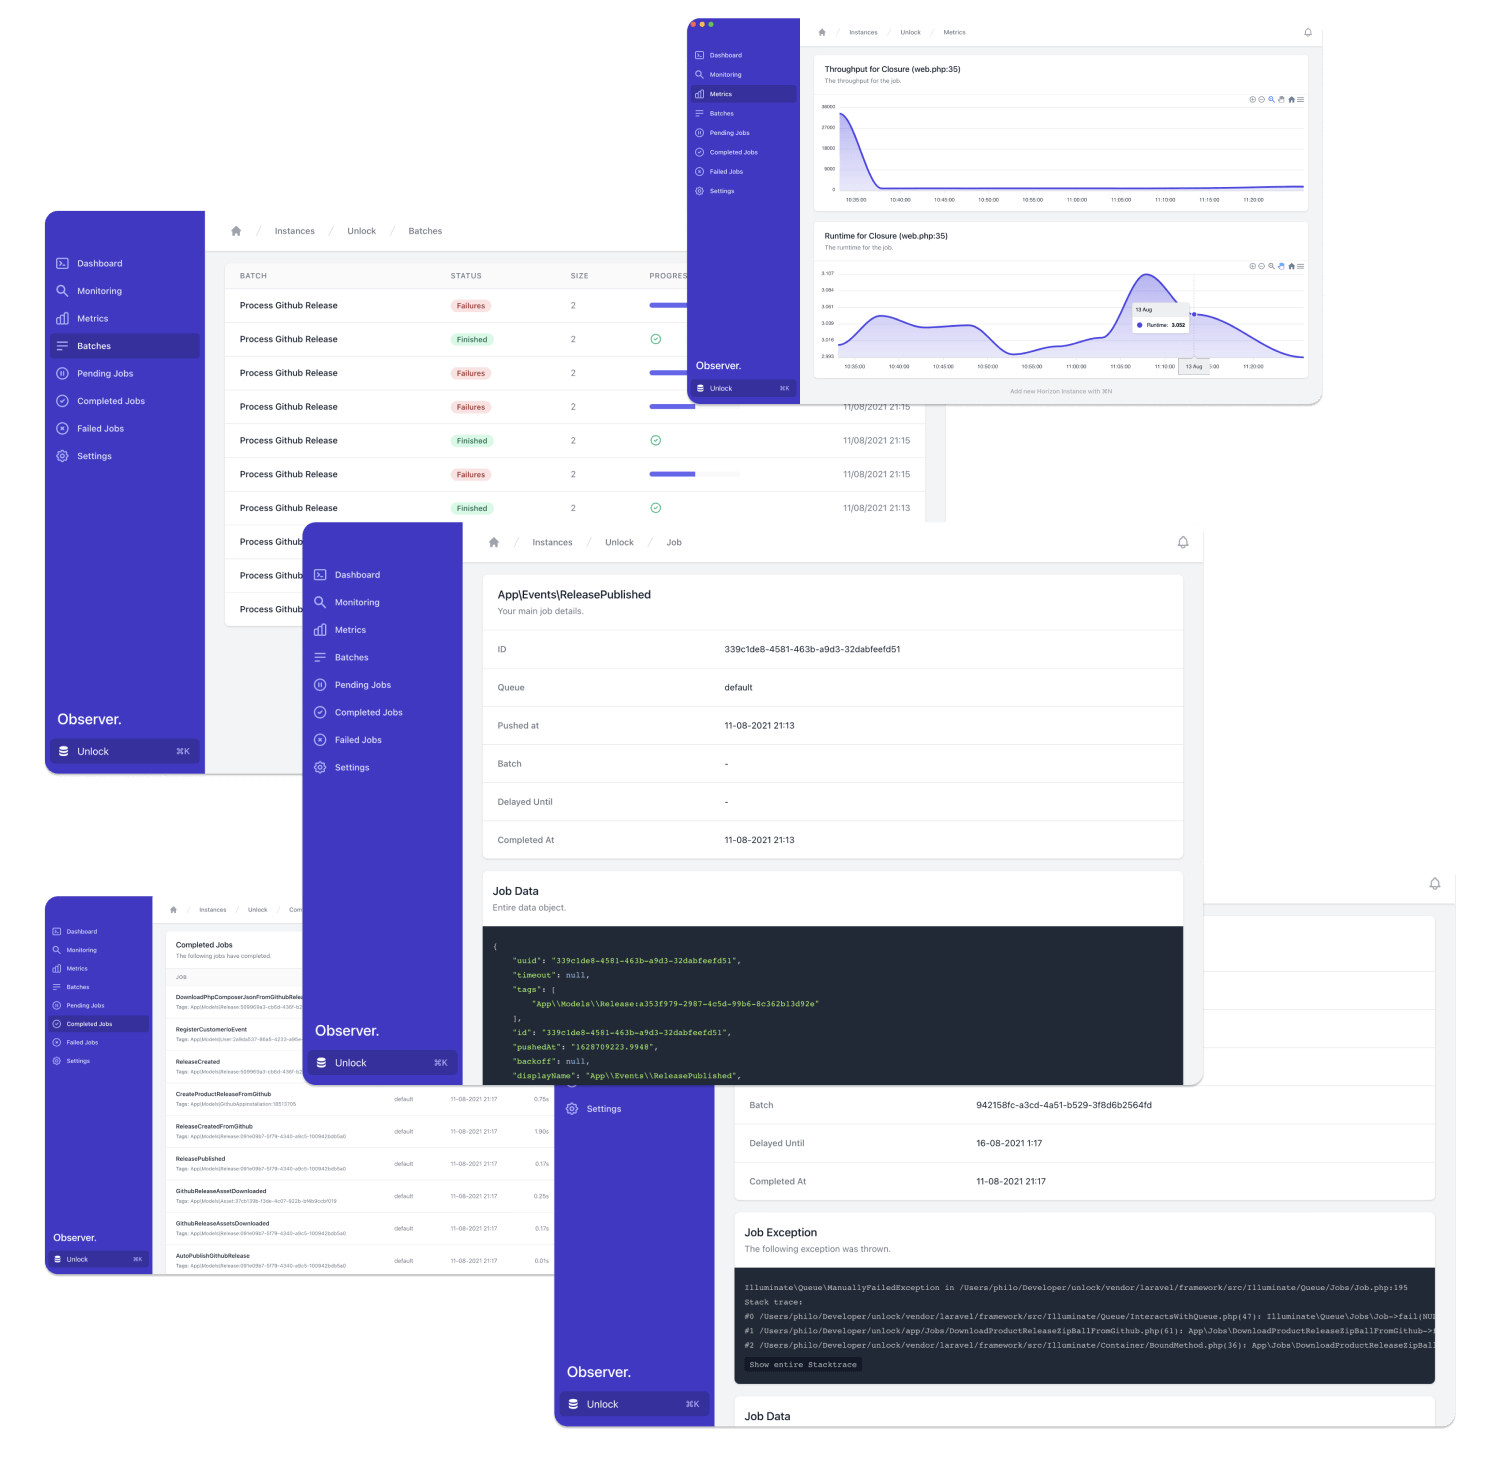
In the end, I might have gone a bit overboard 🙈, but I think the final result is something I will use daily, and I think you will too. So without further ado, I would like to present Observer.
Observer is an Electron desktop application, which means I've used HTML, CSS, and Javascript or, more specifically, React, NextJS, and Tailwind CSS. These technologies together have been quite a joy to work with.
Observer boosts your productivity, given you now have a single application to manage all your Horizon instances. Adding a new instance only takes two minutes.
Required Laravel configuration
Observer uses Horizon's API from a 'different' domain; you need to configure your Laravel application to allow remote requests to the Horizon API endpoint via the CORS settings. Open config/cors.php and add horizon/* to the paths:
<?php

return [

    'paths' => ['horizon/*'],

    // ...
];Observer will now be able to present all information. If you want to manage tags or retry jobs, you will need to add an exception to the VerifyCsrfToken middleware. Given we are making stateless requests, we don't have an csrf token. Open app/Http/Middleware/VerifyCsrfToken.php and add horizon/*:
class VerifyCsrfToken extends Middleware
{
    /**
     * The URIs that should be excluded from CSRF verification.
     *
     * @var array
     */
    protected $except = [
        'horizon/*'
    ];
}
This change is all it takes for Observer to do its magic for your local environment, given Horizon doesn't do any authorization locally.
Horizon will verify if you can view the Horizon dashboard via the viewHorizon ability for any other environment like acceptance, testing, staging, and production. Right now, you are probably verifying this permission by checking the current authenticated user. Let's change this so we can authenticate via an API key.
Let's open app/Providers/HorizonServiceProvider.php and replace the gate method:
    /**
     * Register the Horizon gate.
     *
     * This gate determines who can access Horizon in non-local environments.
     *
     * @return void
     */
    protected function gate()
    {
        Gate::define('viewHorizon', function ($user = null) {
            if (empty($user)) {
                return request()->bearerToken() === config('services.horizon.secret');
            } else {
                return in_array($user->email, [
                    // your email
                ]);
            }
        });
    }
This change will use the Authorization header instead of the user if Laravel did not detect a logged-in user. It's best practice not to include any credentials in your code, so that's why we are referencing our services.php instead. We need to make sure we add this, of course:
<?php

return [

    /*
    |--------------------------------------------------------------------------
    | Third Party Services
    |--------------------------------------------------------------------------
    |
    | This file is for storing the credentials for third party services such
    | as Mailgun, Postmark, AWS and more. This file provides the de facto
    | location for this type of information, allowing packages to have
    | a conventional file to locate the various service credentials.
    |
    */

    // ...

    'horizon' => [
        'secret' => env('HORIZON_SECRET')
    ],

];
Now you can add your secret to your .env file, and you are all set!
Add your first Laravel Horizon instance.
Launch Observer and add your first Horizon instance. Tip! You can use the ⌘+N shortcut on your keyboard to quickly add a new Horizon instance.
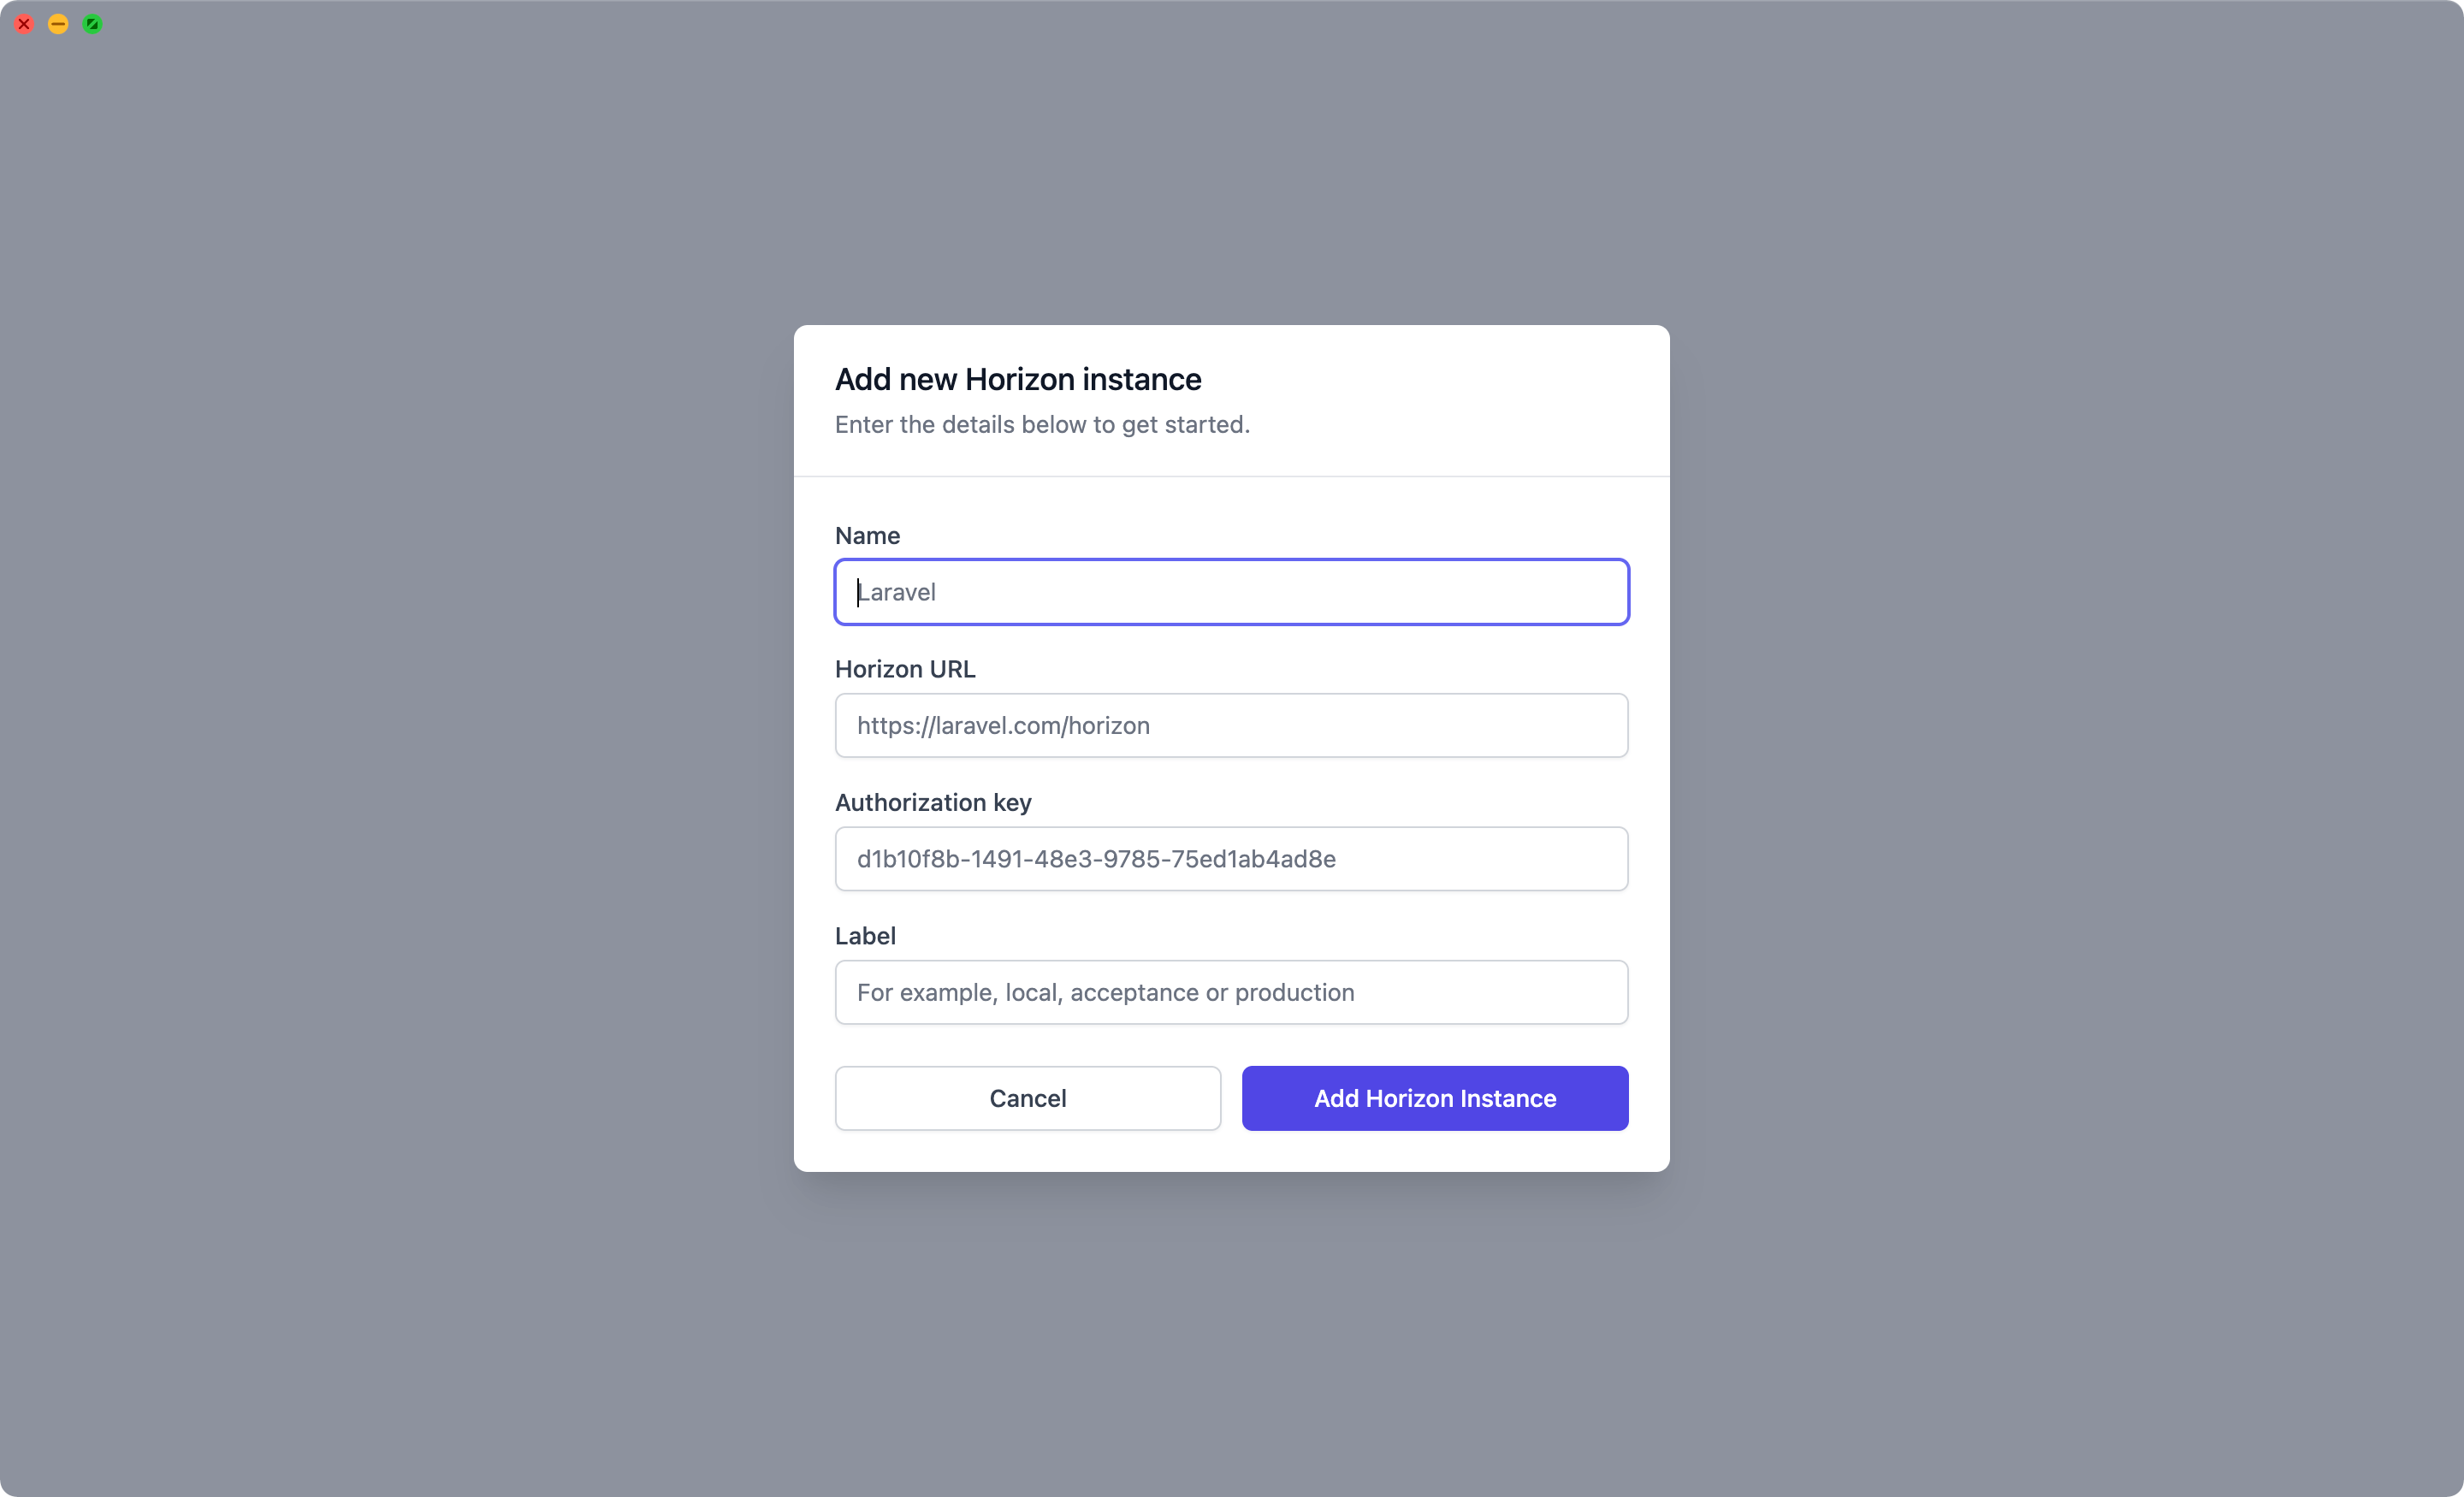
Please enter the name of your Laravel application, the Horizon URL, your authorization / API key we defined earlier for production environments, and optionally a label to make it easier to differentiate environments.
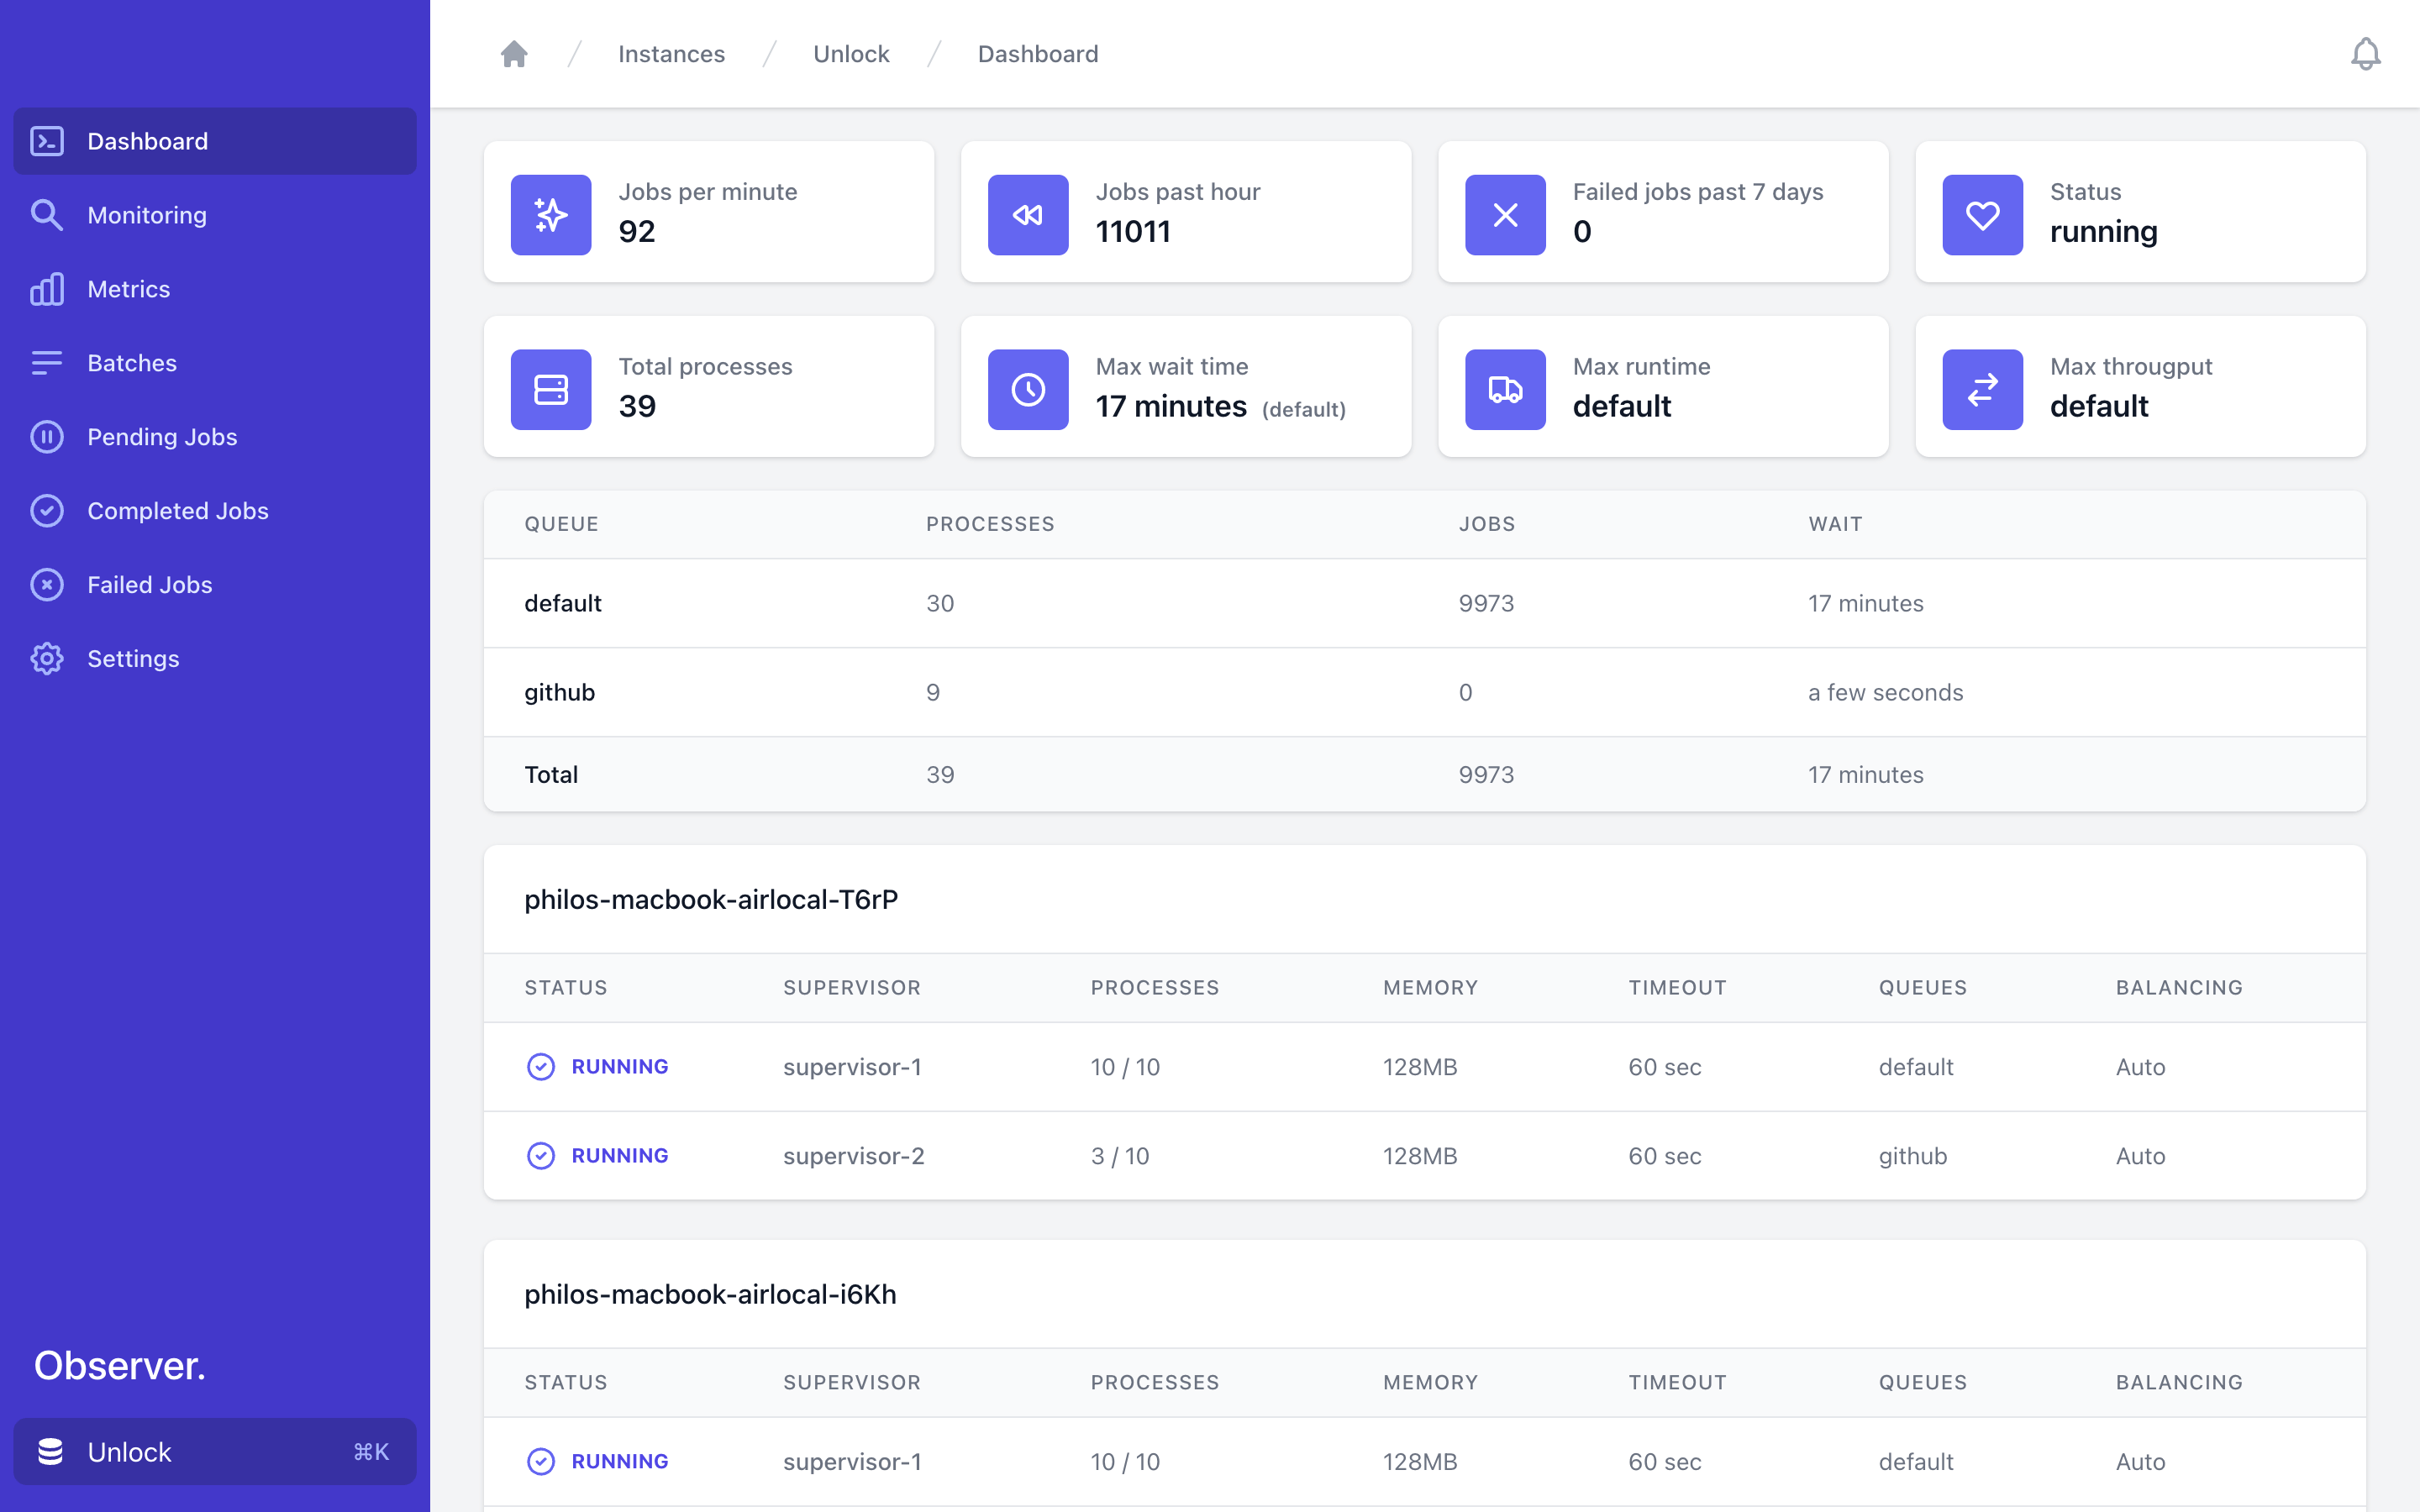
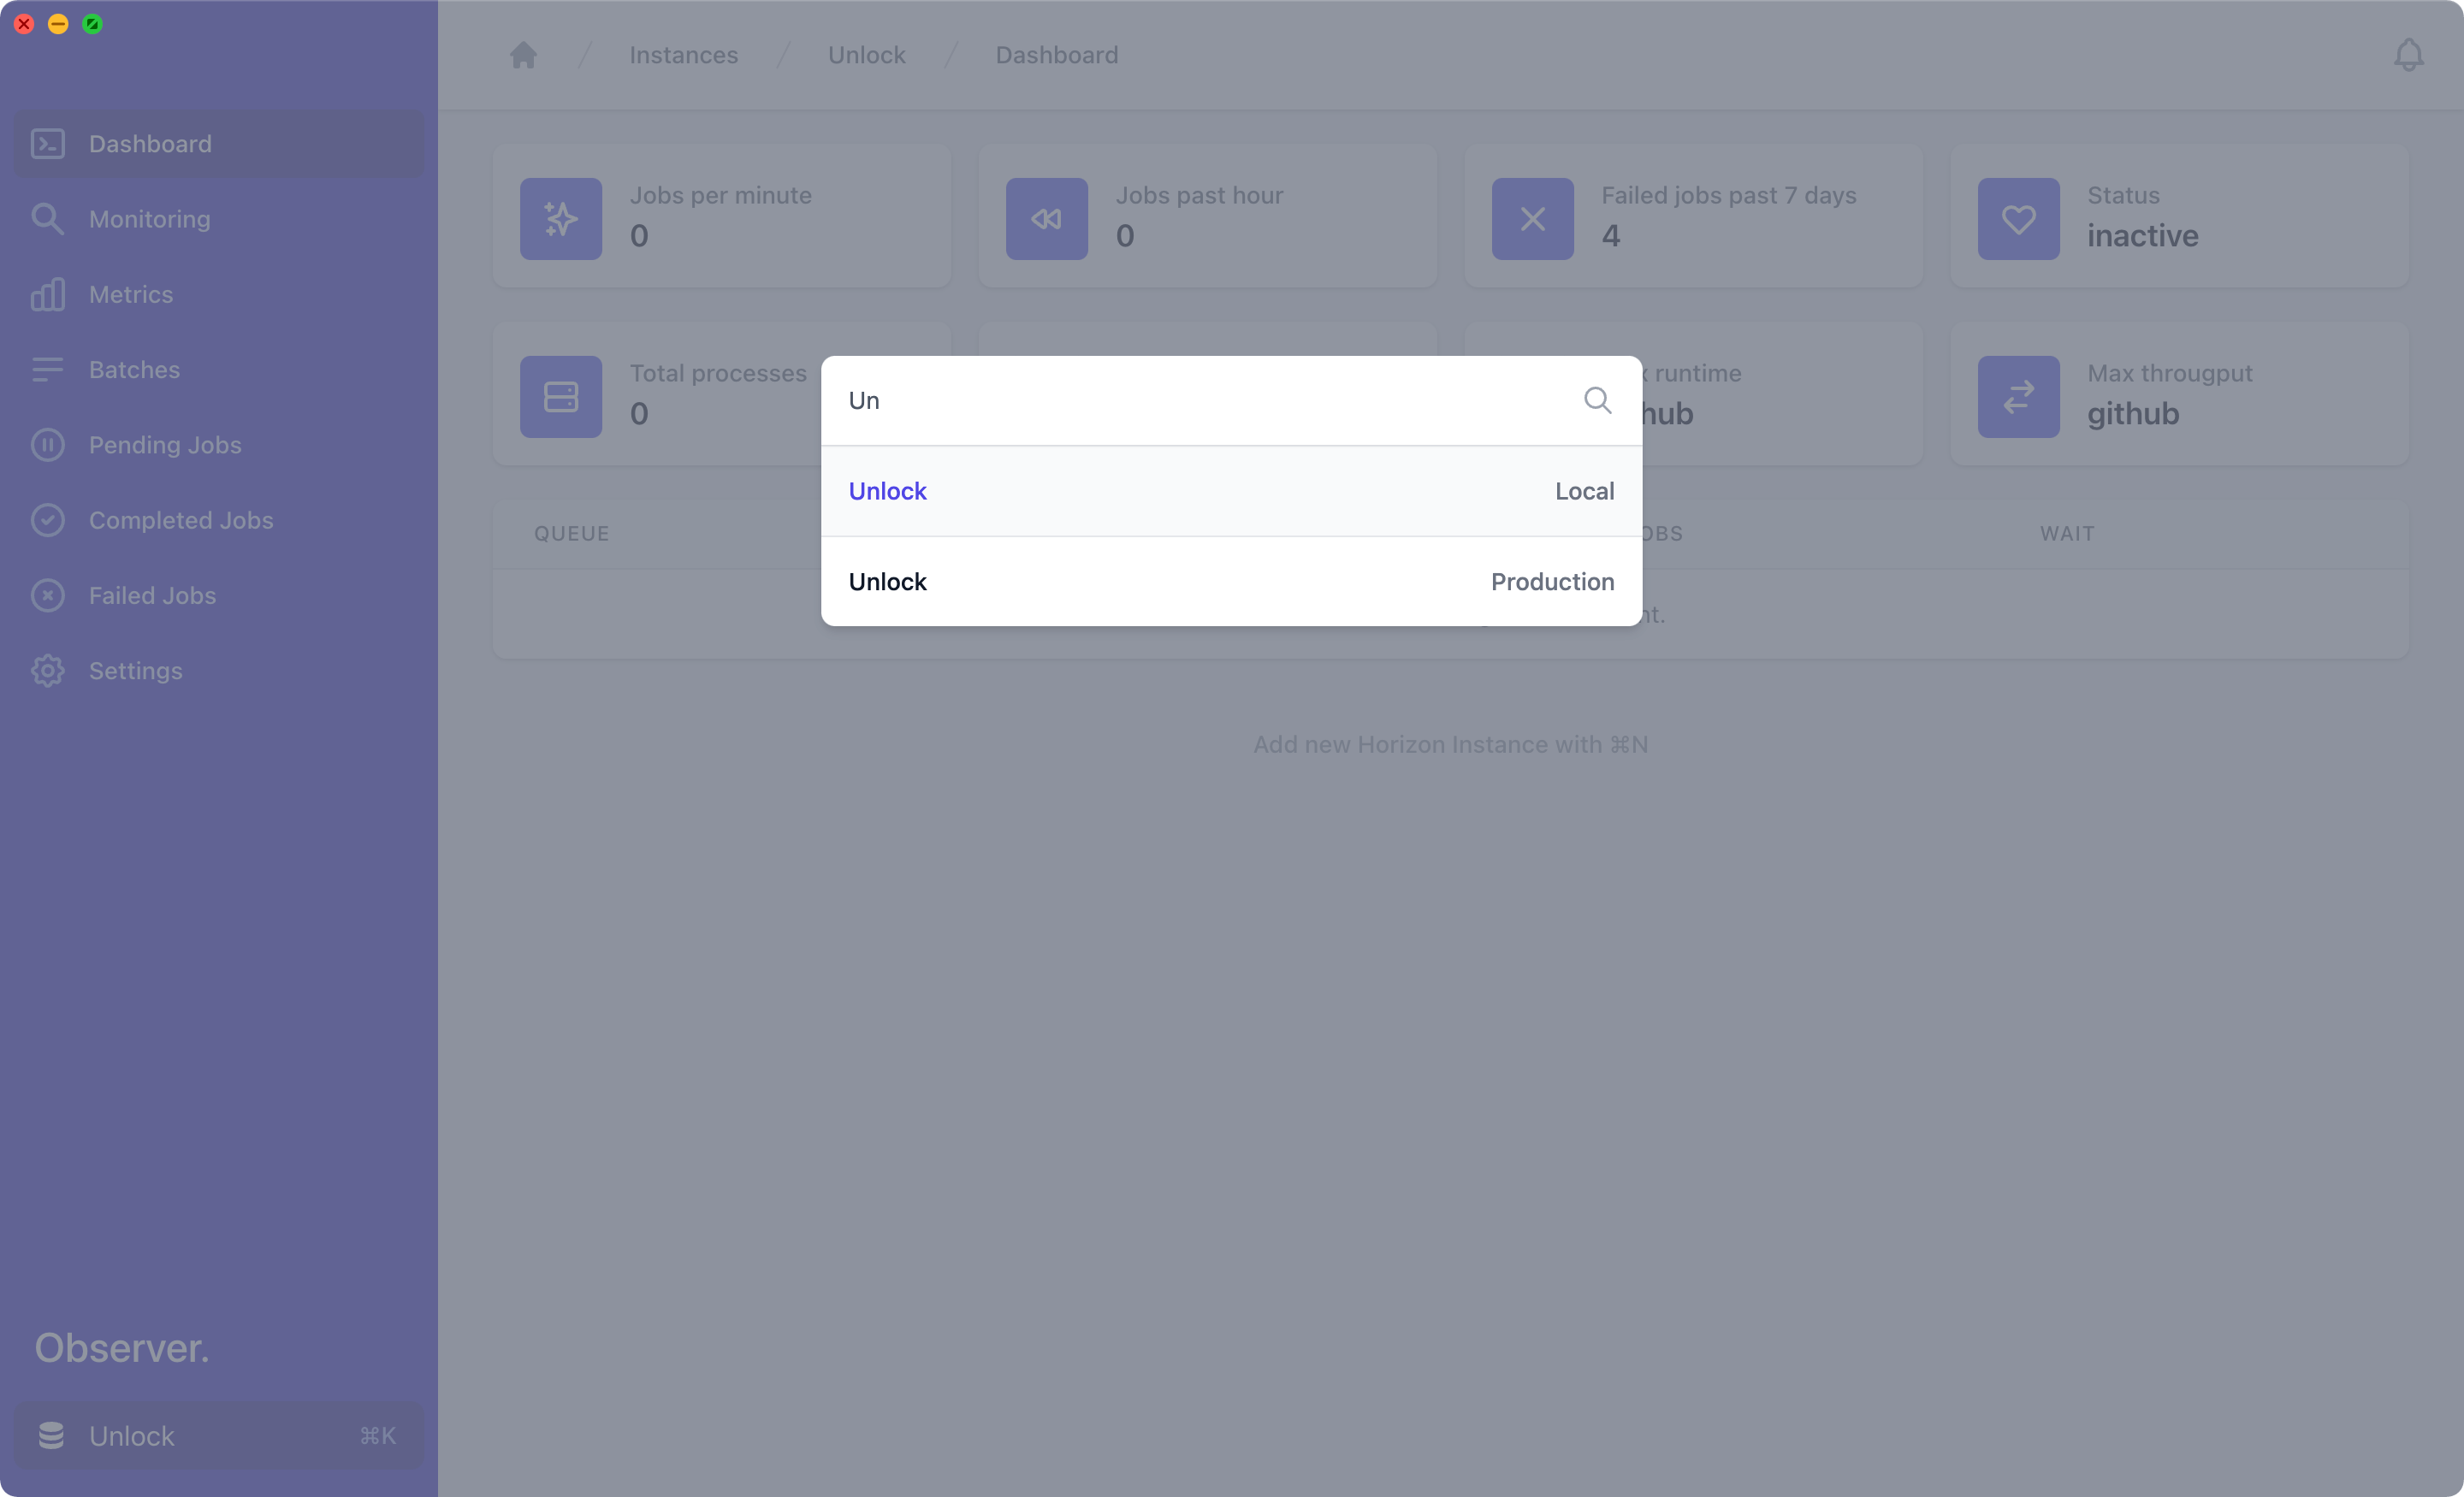
You should now see the dashboard with information about your queue 😎. Tip! Besides clicking the instance switcher in the bottom left corner, you can quickly navigate between Horizon instances via the ⌘+K shortcut on your keyboard.
Now it's time to explore all the sections 🤩 have fun! You can get your copy of Observer at observer.dev.
I'm looking forward to hearing your feedback. Drop me a message on Twitter.