
Recently I released my first Electron application. When my application was ready to be released, it was required to have it notarized by Apple, or else nobody could use my your application. Although there are quite a few articles on this matter, it still took some trial and error because I ran into a couple of problems that were not mentioned. To save others some time figuring these things out, I've created this walkthrough to get you started.
Electron Builder
I've used Electron Builder together with the Electro Builder Vue CLI to build my first application. According to the official Electron website, it's described as a "complete solution to package and build a ready-for-distribution Electron app that focuses on an integrated experience."
From my experience, Electron Builder works excellent during development, but it seems a bit buggy in regards to making your application available to the general public. I've experienced some issues with notarizing and publishing. So I might give Electron Forge (maintained by Electron) a try for my next application to see how that works compared to Electron Builder (maintained by a third-party).
Apple Developer Program
In order to distribute your Electron app on macOS, you need to participate in Apple's Developer Program, which costs $99 per year. You can sign up for an developer account at https://developer.apple.com.
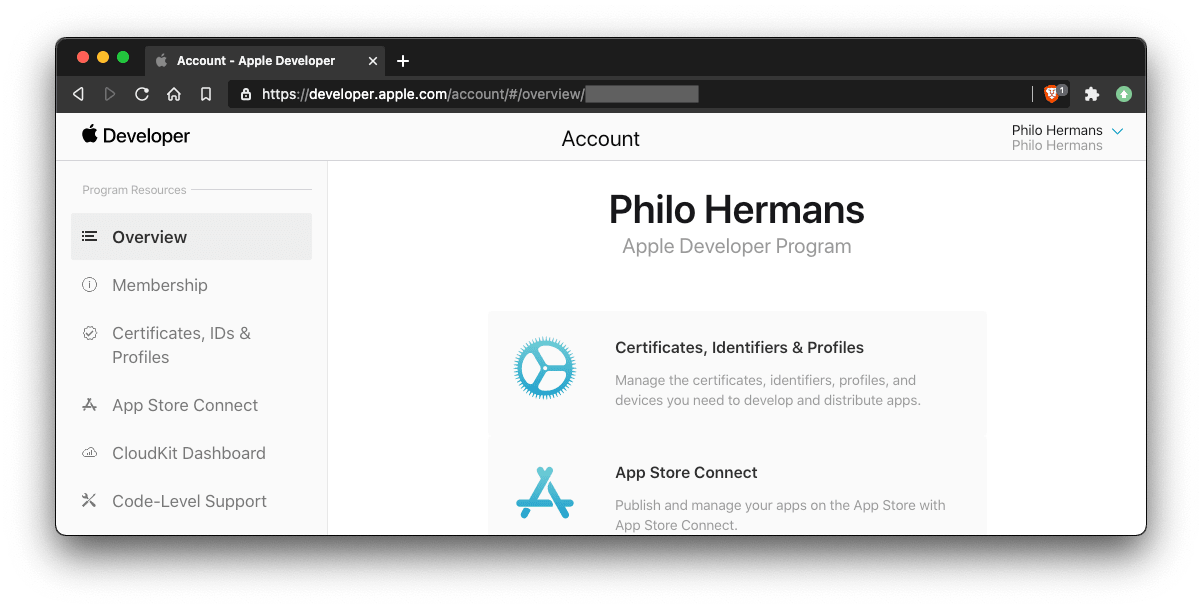
Head over to your Developer Portal and click on "Certificates, IDs & Profiles."
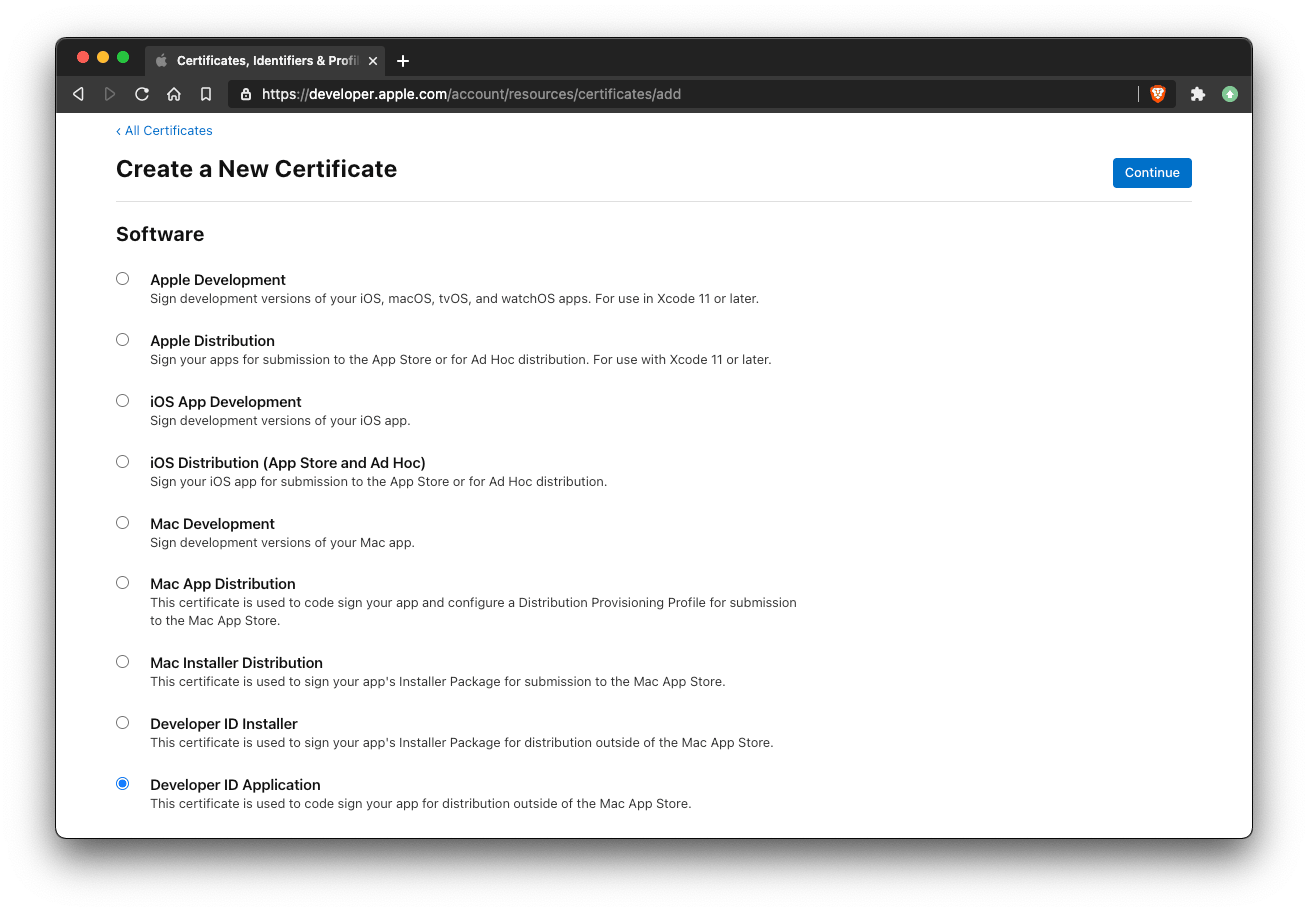
Next, head over to "Certificates" and click the blue plus icon to create a new certificate. Depending on your distribution wishes, you need to select a certificate type. In this example, we will go ahead and select "Developer ID Application," which reads, "This certificate is used to code sign your app for distribution outside of the Mac App Store."
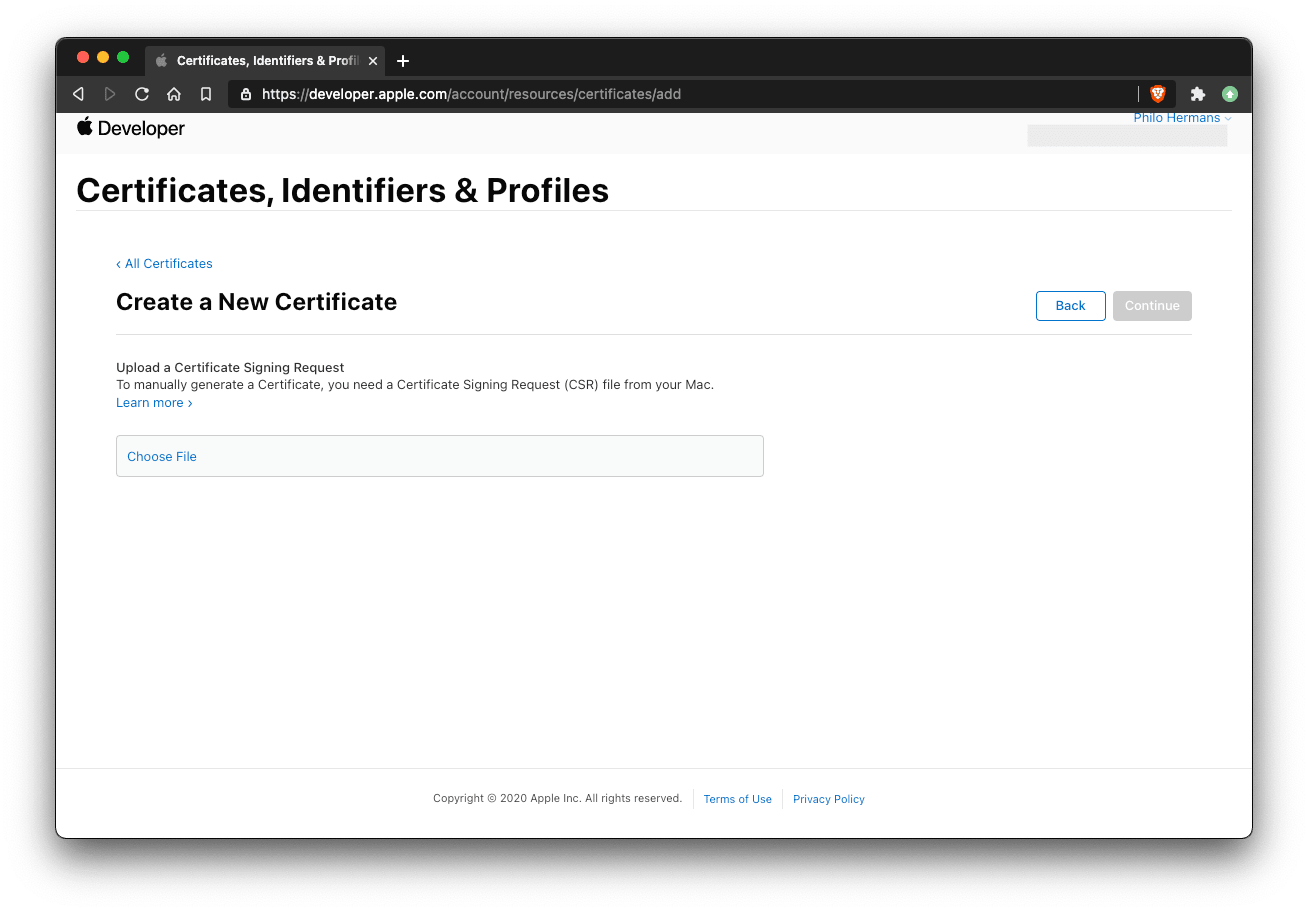
Next up, we need to upload a "Certificate Signing Request." You can create this with the Keychain Tool on your Mac. You can find this application in /Applications/Utilities
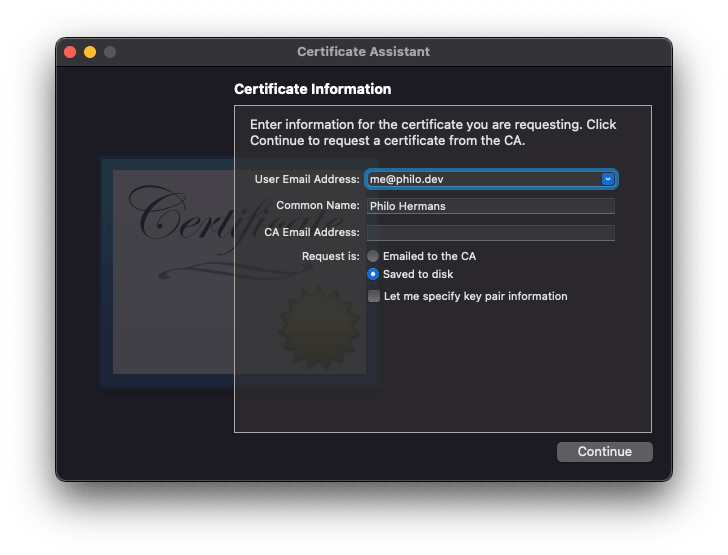
Next, choose Keychain Access > Certificate Assistant > Request a Certificate from a Certificate Authority. Fill out the form:
User Email Address: <your email address>
Common Name: <anything>
CA Email Address: <leave empty>
Request is: Saved to disk
This will create a new file .certSigningRequest. Head back to Apple's Developer Portal again and upload the certificate signing request.
Now download your certificate to your Mac, then double click the .cer file to install in Keychain Access. If you don't do this, you will get some strange errors from Apple when notarizing your application, which doesn't tell you anything useful:
Notarizing nl.philo.artisan-remote found at ./artisan-remote-app/dist_electron/mac/Artisan Remote.app
Error: Apple failed to notarize your application, check the logs for more info

Status Code: 2
Message: Package Invalid
Logs: https://osxapps-ssl.itunes.apple.com/itunes-assets/...

{
  "logFormatVersion": 1,
  "jobId": "cabb3b08-744a-4b94-853c-62fb7908bd25",
  "status": "Invalid",
  "statusSummary": "Archive contains critical validation errors",
  "statusCode": 4000,
  "archiveFilename": "Artisan_Remote.zip",
  "uploadDate": "2020-12-22T22:45:50Z",
  "sha256": "3199b031a2d8819bec4ea52973a363657a8a221d81cc764c3169115cf1dda893",
  "ticketContents": null,
  "issues": [
    {
      "severity": "error",
      "code": null,
      "path": "Artisan_Remote.zip/Artisan Remote.app/Contents/MacOS/Artisan Remote",
      "message": "The binary is not signed.",
      "docUrl": null,
      "architecture": "x86_64"
    },
    {
      "severity": "error",
      "code": null,
      "path": "Artisan_Remote.zip/Artisan Remote.app/Contents/MacOS/Artisan Remote",
      "message": "The signature does not include a secure timestamp.",
      "docUrl": null,
      "architecture": "x86_64"
    },
        {
      "severity": "error",
      "code": null,
      "path": "Artisan_Remote.zip/Artisan Remote.app/Contents/MacOS/Artisan Remote",
      "message": "The executable does not have the hardened runtime enabled.",
      "docUrl": null,
      "architecture": "x86_64"
    },
    //
}Configure after sign hook
Electron Builder also uses Electron Notarize behind the scenes. For example, this is the afterSignHook.js I'm using:
// "afterSign": "./afterSignHook.js",

require('dotenv').config();
const fs = require('fs');
const path = require('path');
var electron_notarize = require('electron-notarize');

module.exports = async function (params) {
    if (process.platform !== 'darwin') {
        return;
    }

    console.log('afterSign hook triggered', params);

    let appId = 'nl.philo.artisan-remote'

    let appPath = path.join(params.appOutDir, `${params.packager.appInfo.productFilename}.app`);
    if (!fs.existsSync(appPath)) {
        console.log('skip');
        return;
    }

    console.log(`Notarizing ${appId} found at ${appPath}`);

    try {
        await electron_notarize.notarize({
            appBundleId: appId,
            appPath: appPath,
            appleId: process.env.APPLE_ID,
            appleIdPassword: process.env.APPLE_ID_PASSWORD,
        });
    } catch (error) {
        console.error(error);
    }

    console.log(`Done notarizing ${appId}`);
};
Make sure you adjust the appId to your app's name; the convention is country.company.appname. Finally, you need to set your Apple ID and password. It's recommended not to include your credentials in your code, so please use environment variables when possible. There is no API key you can use instead of a password but you can at least generate app specific passwords, so you don't need to write your personal password. Apple will provide you with something like edqv-akmn-hasr-tyui.
That should do it. You should now be able to successfully notarize your application with the npm run osx:build command.
Tip: If you want to know more about the inner workings of how your application is signed and notarized, look at the electron-osx-sign and electron-builder-notarize NPM package.
At the time of writing Electron Builder still contains a bug that causes the your-app-mac.zip file to have an unsigned copy of your application (the your-app.dmg will work just fine).
Luckily someone wrote a workaround (I've made some adjustments for it to work with my Vue boilerplate). Place this file in the root of your project.
const path = require('path');
const {execSync} = require('child_process');
const fs = require('fs');
const yaml = require('js-yaml');
const {appBuilderPath} = require('app-builder-bin');

module.exports = function (params) {
    console.log('Verification if MacOS build is present.');

    let macBuild = false;

    params.platformToTargets.forEach((value, platform) => {
        if (platform.name === 'mac') {
            macBuild = value.get('zip').packager;
        }
    });

    if (!macBuild) {
        console.log('No MacOS build is present in platform targets.');
        return;
    }

    console.log('Mac OS build found, creating new archive.');
    execSync(
        `ditto -c -k --sequesterRsrc --keepParent --zlibCompressionLevel 9 "${params.outDir}/mac/${macBuild.appInfo.productFilename}.app" "${params.outDir}/${macBuild.appInfo.productFilename}-${macBuild.appInfo.buildVersion}-mac.zip"`
    );

    console.log('Mac OS build archive has been created.');

    const APP_GENERATED_BINARY_PATH = path.join(params.outDir, `${macBuild.appInfo.productFilename}-${macBuild.appInfo.buildVersion}-mac.zip`);

    try {
        let output = execSync(
            `${appBuilderPath} blockmap --input="${APP_GENERATED_BINARY_PATH}" --output="${params.outDir}/${macBuild.appInfo.productFilename}-${macBuild.appInfo.buildVersion}-mac.zip.blockmap" --compression=gzip`
        );
        let {sha512, size} = JSON.parse(output);

        const ymlPath = path.join(params.outDir, 'latest-mac.yml');
        let ymlData = yaml.safeLoad(fs.readFileSync(ymlPath, 'utf8'));

        ymlData.sha512 = sha512;
        ymlData.files[0].sha512 = sha512;
        ymlData.files[0].size = size;
        let yamlStr = yaml.safeDump(ymlData);

        fs.writeFileSync(ymlPath, yamlStr, 'utf8');
        console.log('Successfully updated YAML file and configurations with blockmap.');
    } catch (e) {
        console.log('Error in updating YAML file and configurations with blockmap.', e);
    }
};Electron Builder has a couple of hooks you can use to run the fixMacDistributionArchive.js file. Open your vue.config.js file if you are using the Vue CLI and add the afterAllArtifactBuild:
module.exports = {
    configureWebpack: {
        devtool: 'source-map',
        resolve: {
            alias: {
                'vue$': 'vue/dist/vue.esm.js'
            }
        }
    },
    pluginOptions: {
        electronBuilder: {
            nodeIntegration: true,
            builderOptions: {
                mac: {
                    hardenedRuntime: true,
                    entitlements: "./build/entitlements.mac.inherit.plist"
                },
                linux: {
                    target: ["AppImage"]
                },
                publish: ['github'],
                appId: 'nl.codebite.artisan-remote',
                afterSign: './afterSignHook.js',
                afterAllArtifactBuild: './fixMacDistributionArchive.js'
            }
        }
    }
}
Note: The afterAllArtifactBuild is bugged when running any publish command like publish:all. I highly recommend that you use your own publishing script to push your release up to GitHub for example.
All done! You should now be able to share your awesome notarized application app with the rest of the world. I'm working on a solution to make it easier for you to distribute your applications. If you are interested make sure you subscribe and be notified at Unlock.
I'm curious what you think of Electron Builder and if you've tried some alternatives. Tweet me @philo01 and share your experience.
Also, if you want to be notified about more articles about Electron be sure to subscribe or just follow me on Twitter, I appreciate the support 🙌🏼
Auto-updates for private repositories and licensing
If you are building a commercial Electron product you are definitely going to be interested in Unlock. Unlock provides cloud-based licensing, distribution, and reporting for your Electron applications so you can set yourself free from logistics so you can focus on building software instead of packaging, versioning, and distributing products to your customers.